Drivetrain Basics
What you'll learn
- Understand the difference between tank drive and arcade drive
- Configure a drivetrain object in VEXcode Python
- Control speed and direction programmatically
- Write basic movement sequences
Drivetrain Basics
Your robot’s drivetrain is the system of motors, gears, and wheels that makes it move. Think of it like the engine and wheels on a car — without it, your robot is just sitting there looking pretty.
Before we can write any autonomous code, we need to understand how the drivetrain works and how to tell it what to do from our program.
What Is a Drivetrain?
In VEX IQ, a typical drivetrain has two motors — one powering the left wheels and one powering the right wheels. By controlling how fast each side spins (and in which direction), we can make the robot go forward, backward, and turn.
Pretty simple idea, right? But there are actually two different ways to think about controlling those motors.
Tank Drive vs. Arcade Drive
When you drive your robot with a controller during the driver-controlled period, you will usually pick one of these two styles:
Tank Drive
With tank drive, each joystick controls one side of the robot:
- Left joystick controls the left wheels
- Right joystick controls the right wheels
Push both joysticks forward and the robot goes straight. Push only the left one and the robot pivots right. It is called “tank drive” because that is exactly how real tanks work.
Arcade Drive
With arcade drive, a single joystick does everything:
- Push forward/backward to drive forward or backward
- Push left/right to turn
This feels more like a video game, which is why it is called “arcade” drive. Many teams find it more intuitive.
So Which One Do We Use for Autonomous?
Here is the good news: for autonomous programming, it does not matter. We use a drivetrain object in our code that handles all the motor math for us. We just say “drive forward 12 inches” or “turn right 90 degrees” and the drivetrain object figures out what each motor needs to do.
Configuring Your Drivetrain
Before we can command our drivetrain, we need to tell the program which motors are connected and some measurements about our wheels. Here is the basic setup:
Let’s break that down piece by piece.
The Motors
We create two motor objects. The first argument is which port the motor is plugged into on the brain. Check your wiring and use the correct port numbers for your robot.
The second argument (False or True) is whether the motor is reversed.
Wait, Why Is One Motor Reversed?
Great question. Look at your robot from above. The left motor and right motor face opposite directions. When both motors spin the same way, one pushes forward and the other pushes backward — your robot just spins in place.
By reversing one motor in the code, we fix this so that both sides drive the same direction when we tell the robot to go forward. Usually the right motor is the one you reverse, but check your specific build. If your robot drives backward when you tell it to go forward, try swapping which motor is reversed.
The Drivetrain Object
The Drivetrain() line takes four arguments:
- Left motor — the motor on the left side
- Right motor — the motor on the right side
- Wheel travel — the circumference of your wheels in millimeters (how far the robot moves in one full wheel rotation)
- Track width — the distance between the centers of your left and right wheels in millimeters
Getting those measurements right is critical. If your wheel travel is wrong, your robot will drive too far or not far enough. If your track width is wrong, your turns will be off.
Pro tip: Use a ruler or calipers to measure carefully. For standard VEX IQ wheels, common wheel travel values are around 200mm, but always double-check with your specific wheels.
Key Drivetrain Commands
Now for the fun part — actually making the robot move! Here are the commands you will use most often.
VEXcode IQ Blocks — Drivetrain Movement
Driving a Specific Distance
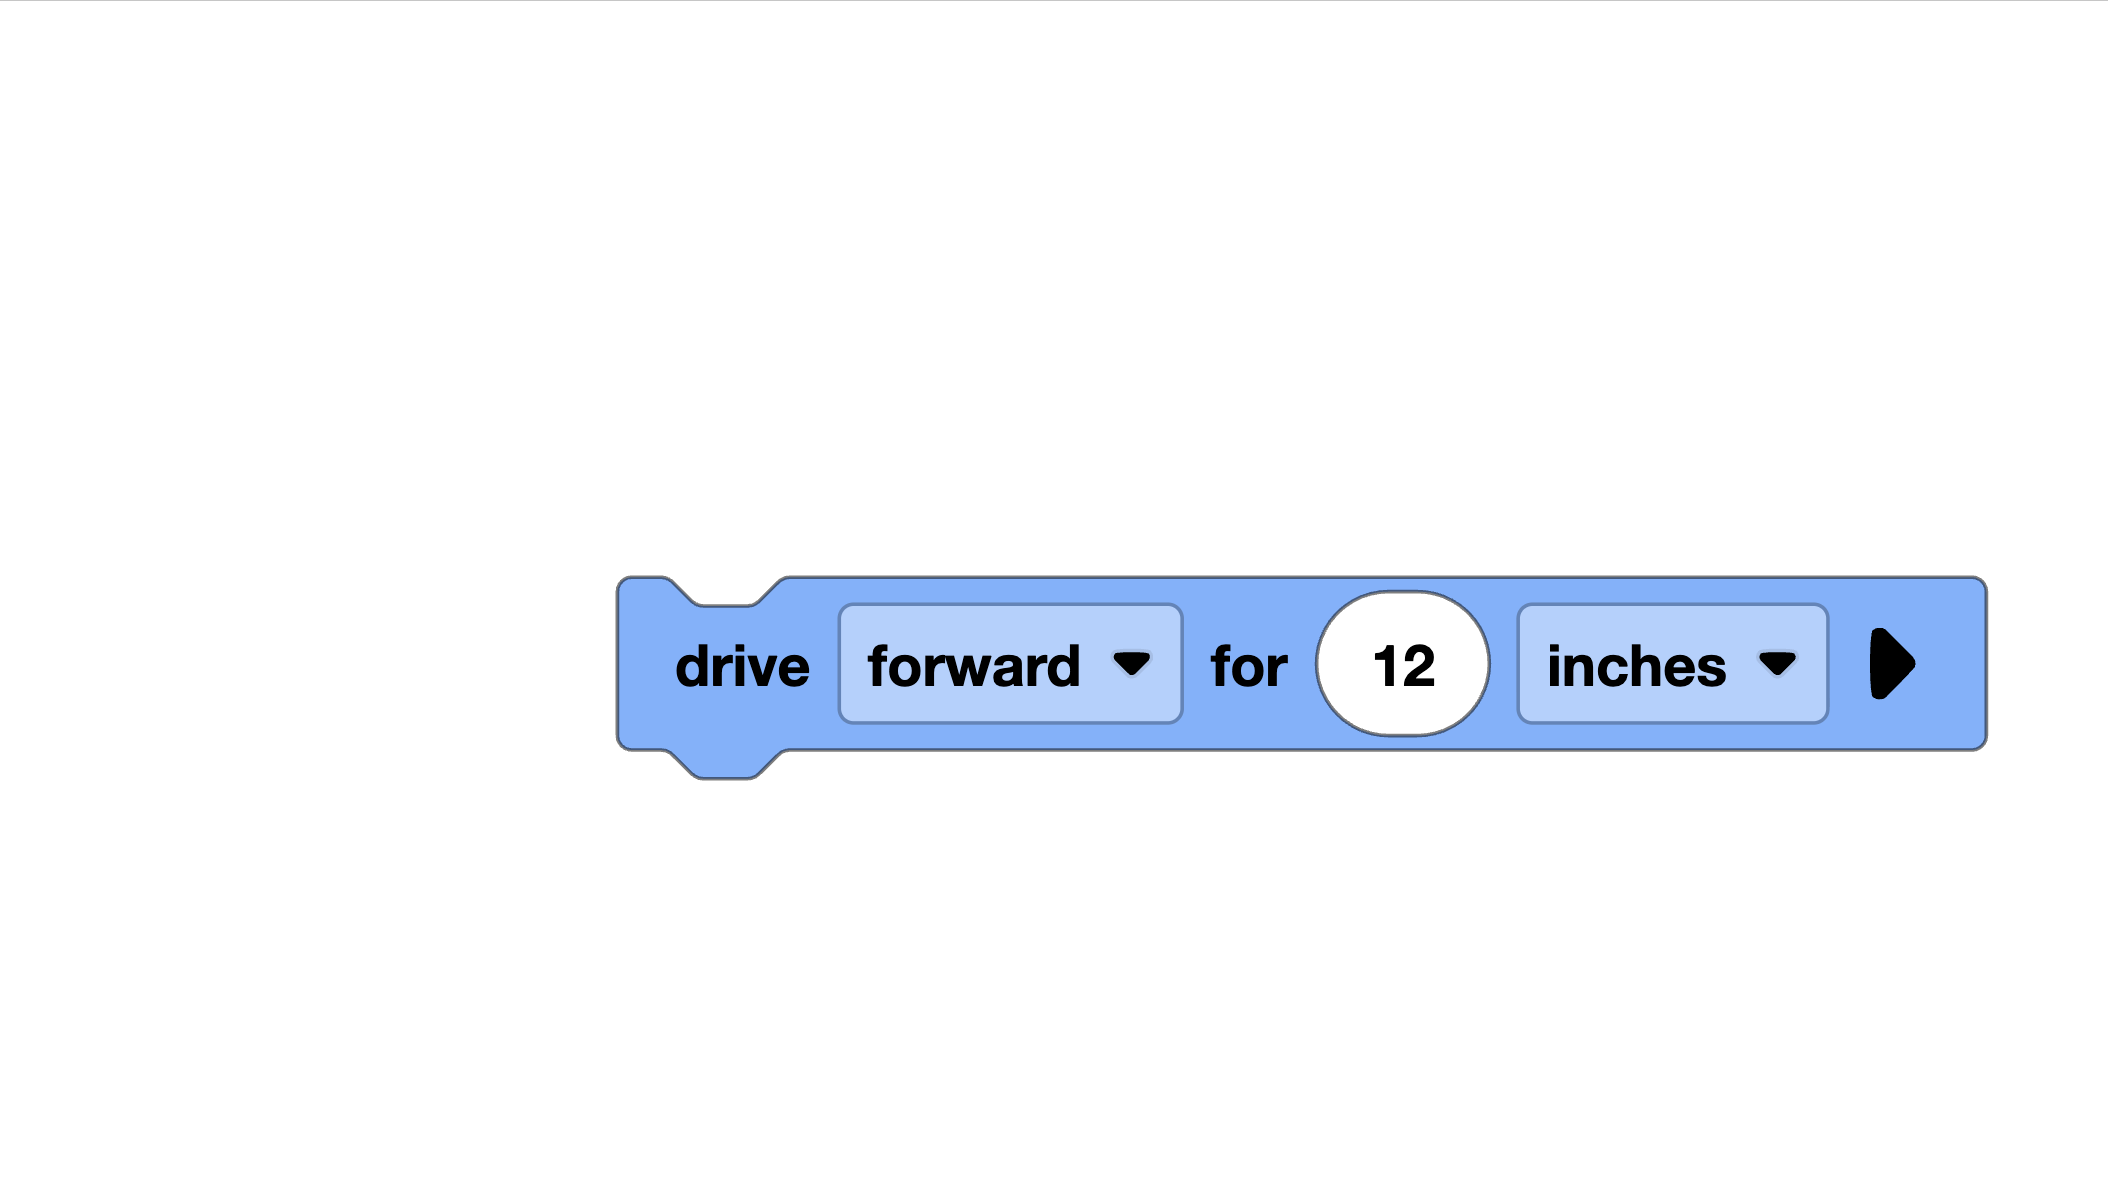
This drives forward exactly 12 inches and then stops. You can also use REVERSE instead of FORWARD to go backward. The robot will not execute the next line of code until it finishes driving — this is called a blocking command.
Turning a Specific Angle
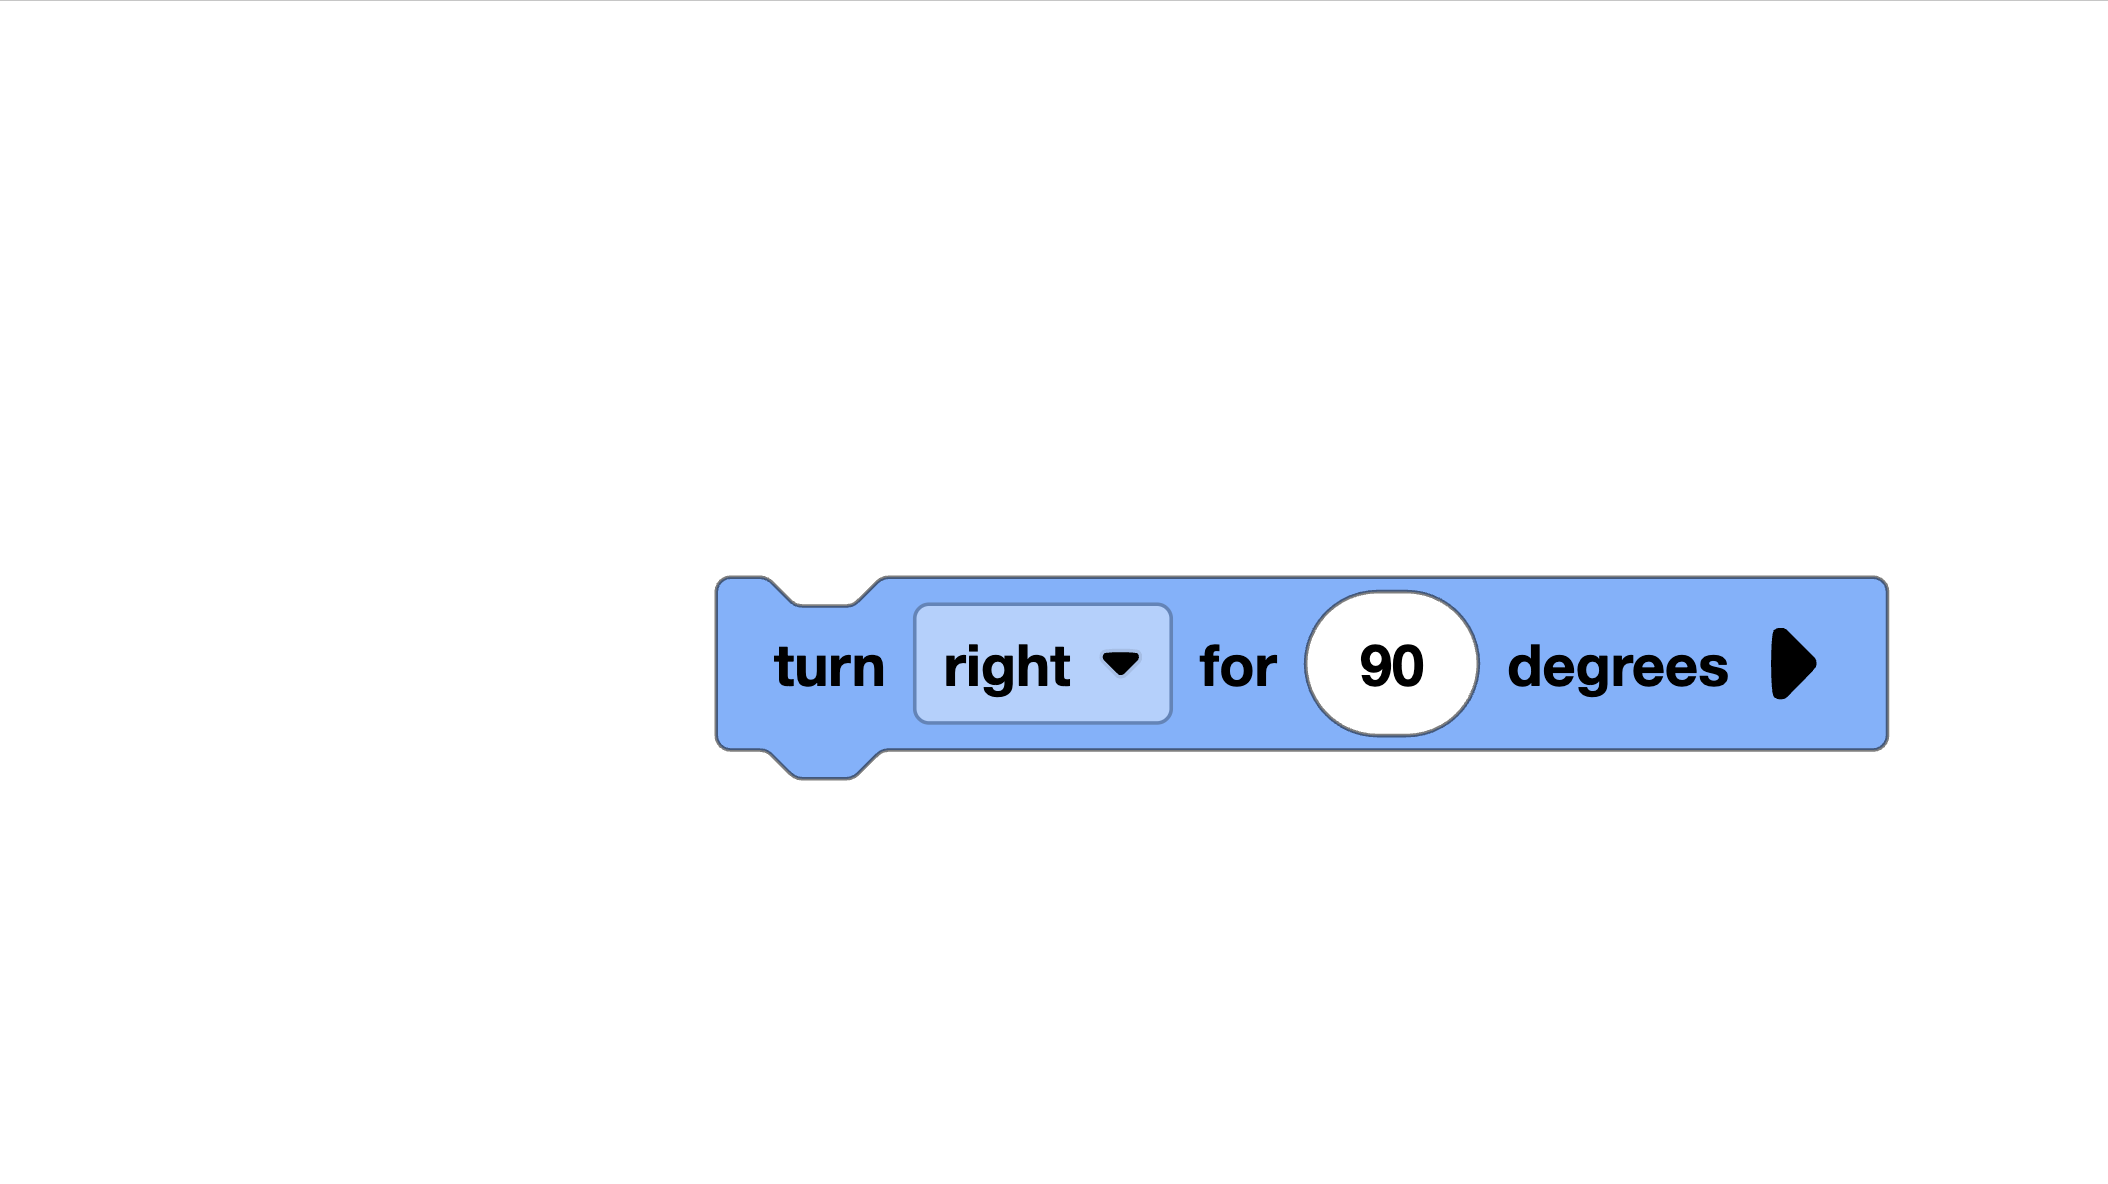
This turns the robot 90 degrees to the right and then stops. Use LEFT for left turns. Like drive_for, this is a blocking command.
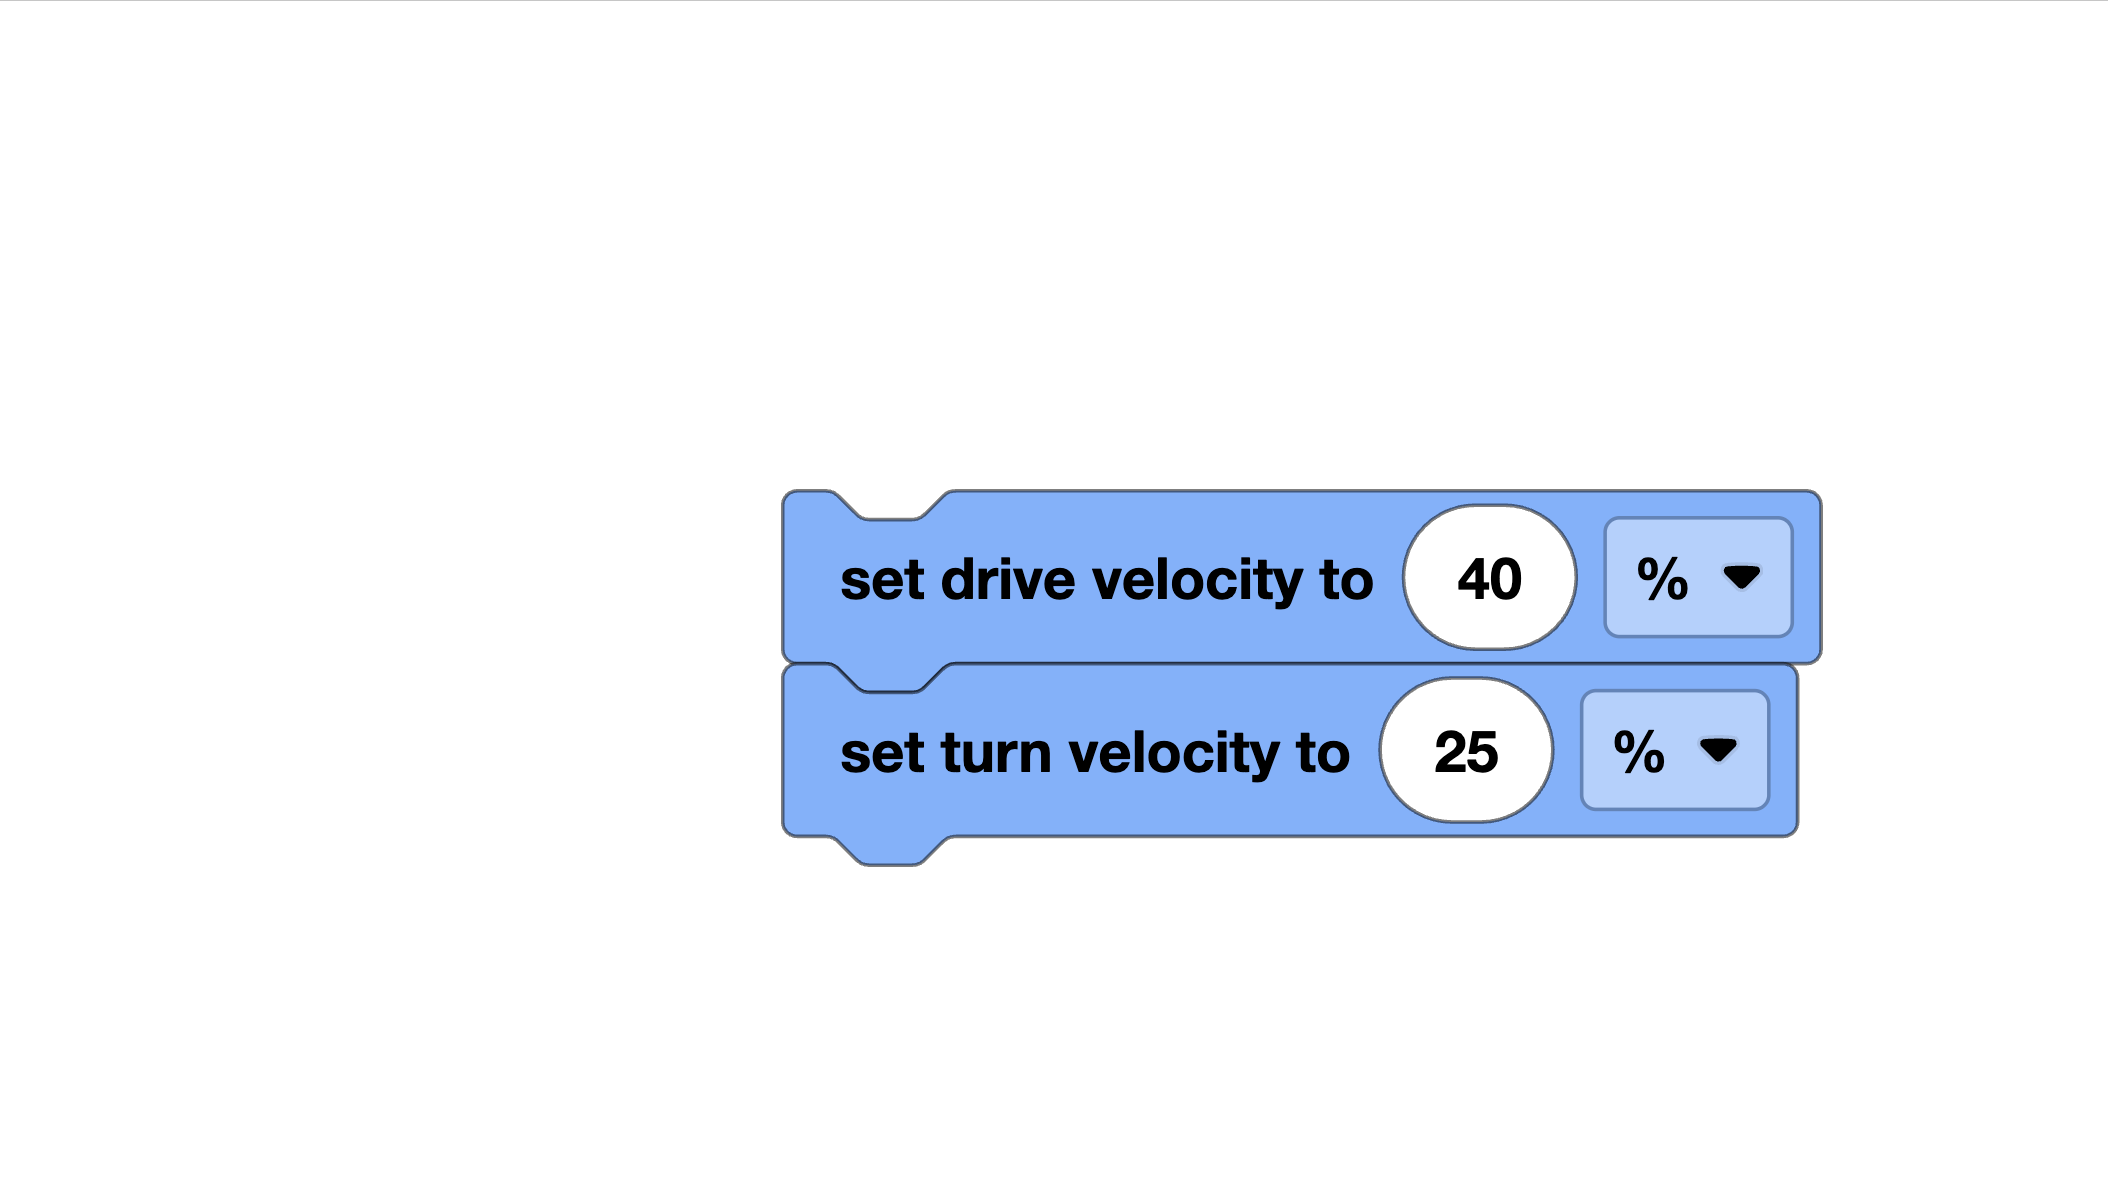
Setting the Speed

This sets how fast the robot drives. The value is a percentage of the motor’s maximum speed. You can also set the turning speed separately:

Continuous Driving
Sometimes you want the robot to just start driving and stop later (maybe when a sensor detects something). For that, use:
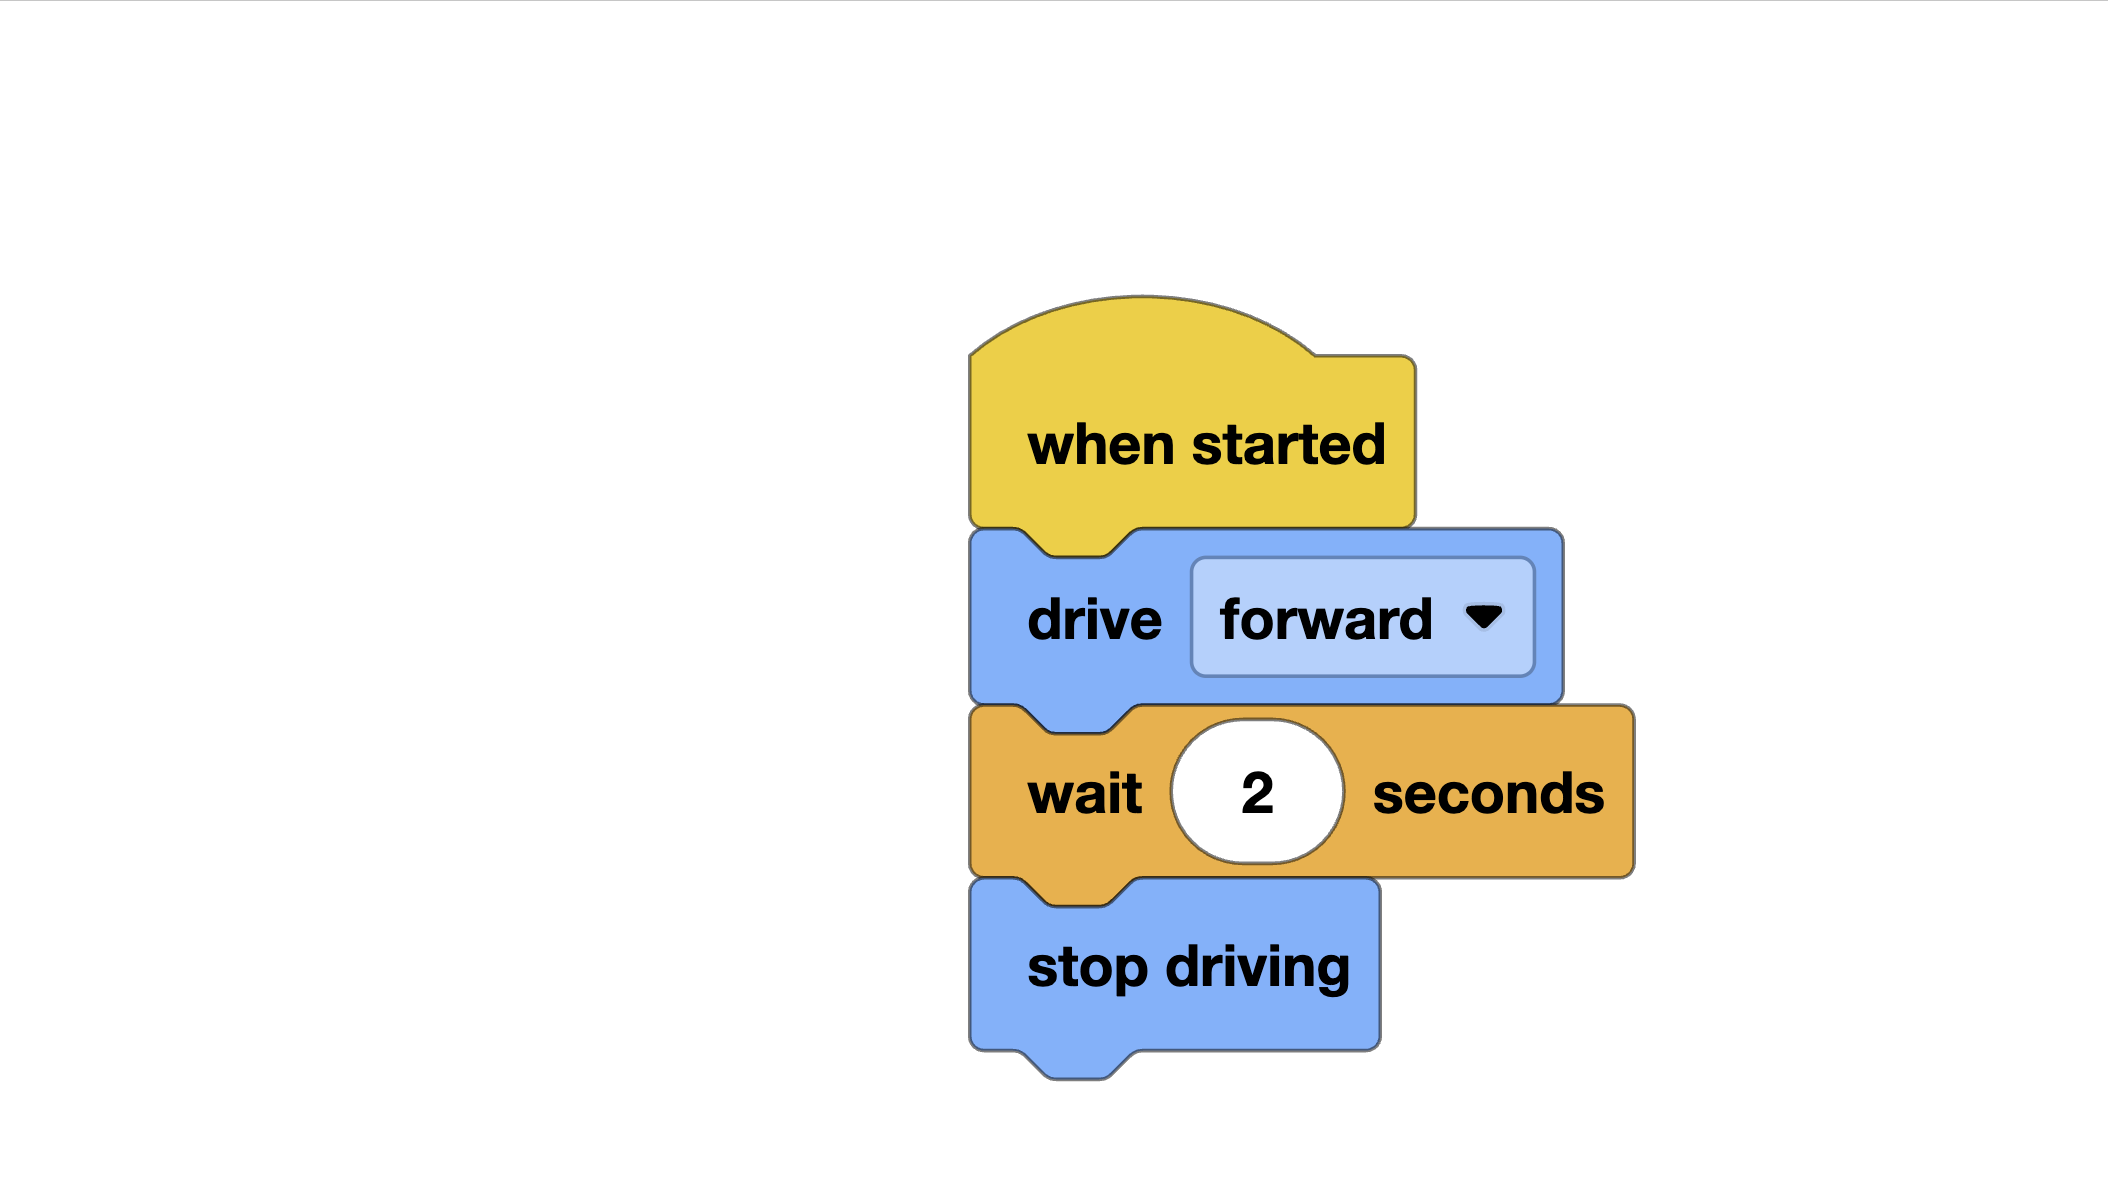
Unlike drive_for, the drive() command is non-blocking — your code keeps running while the robot moves. We will use this a lot when we get to sensor-based driving.
Speed Control: Slow and Steady Wins the Match
It might seem like faster is better, but for autonomous programs, slower is usually more accurate. Here is why:
- At high speeds, the robot’s wheels can slip, especially on smooth surfaces
- The motors need time to accelerate and decelerate, which makes distances less predictable at high speed
- Turns at high speed have more momentum, so the robot overshoots the target angle
A good starting speed for autonomous is 30-50%. You can always increase it later once your routine is working reliably.
Example: Drive in an L-Shape
Let’s write our first real movement sequence. We will drive forward, turn right, and drive forward again to trace an “L” shape on the floor.
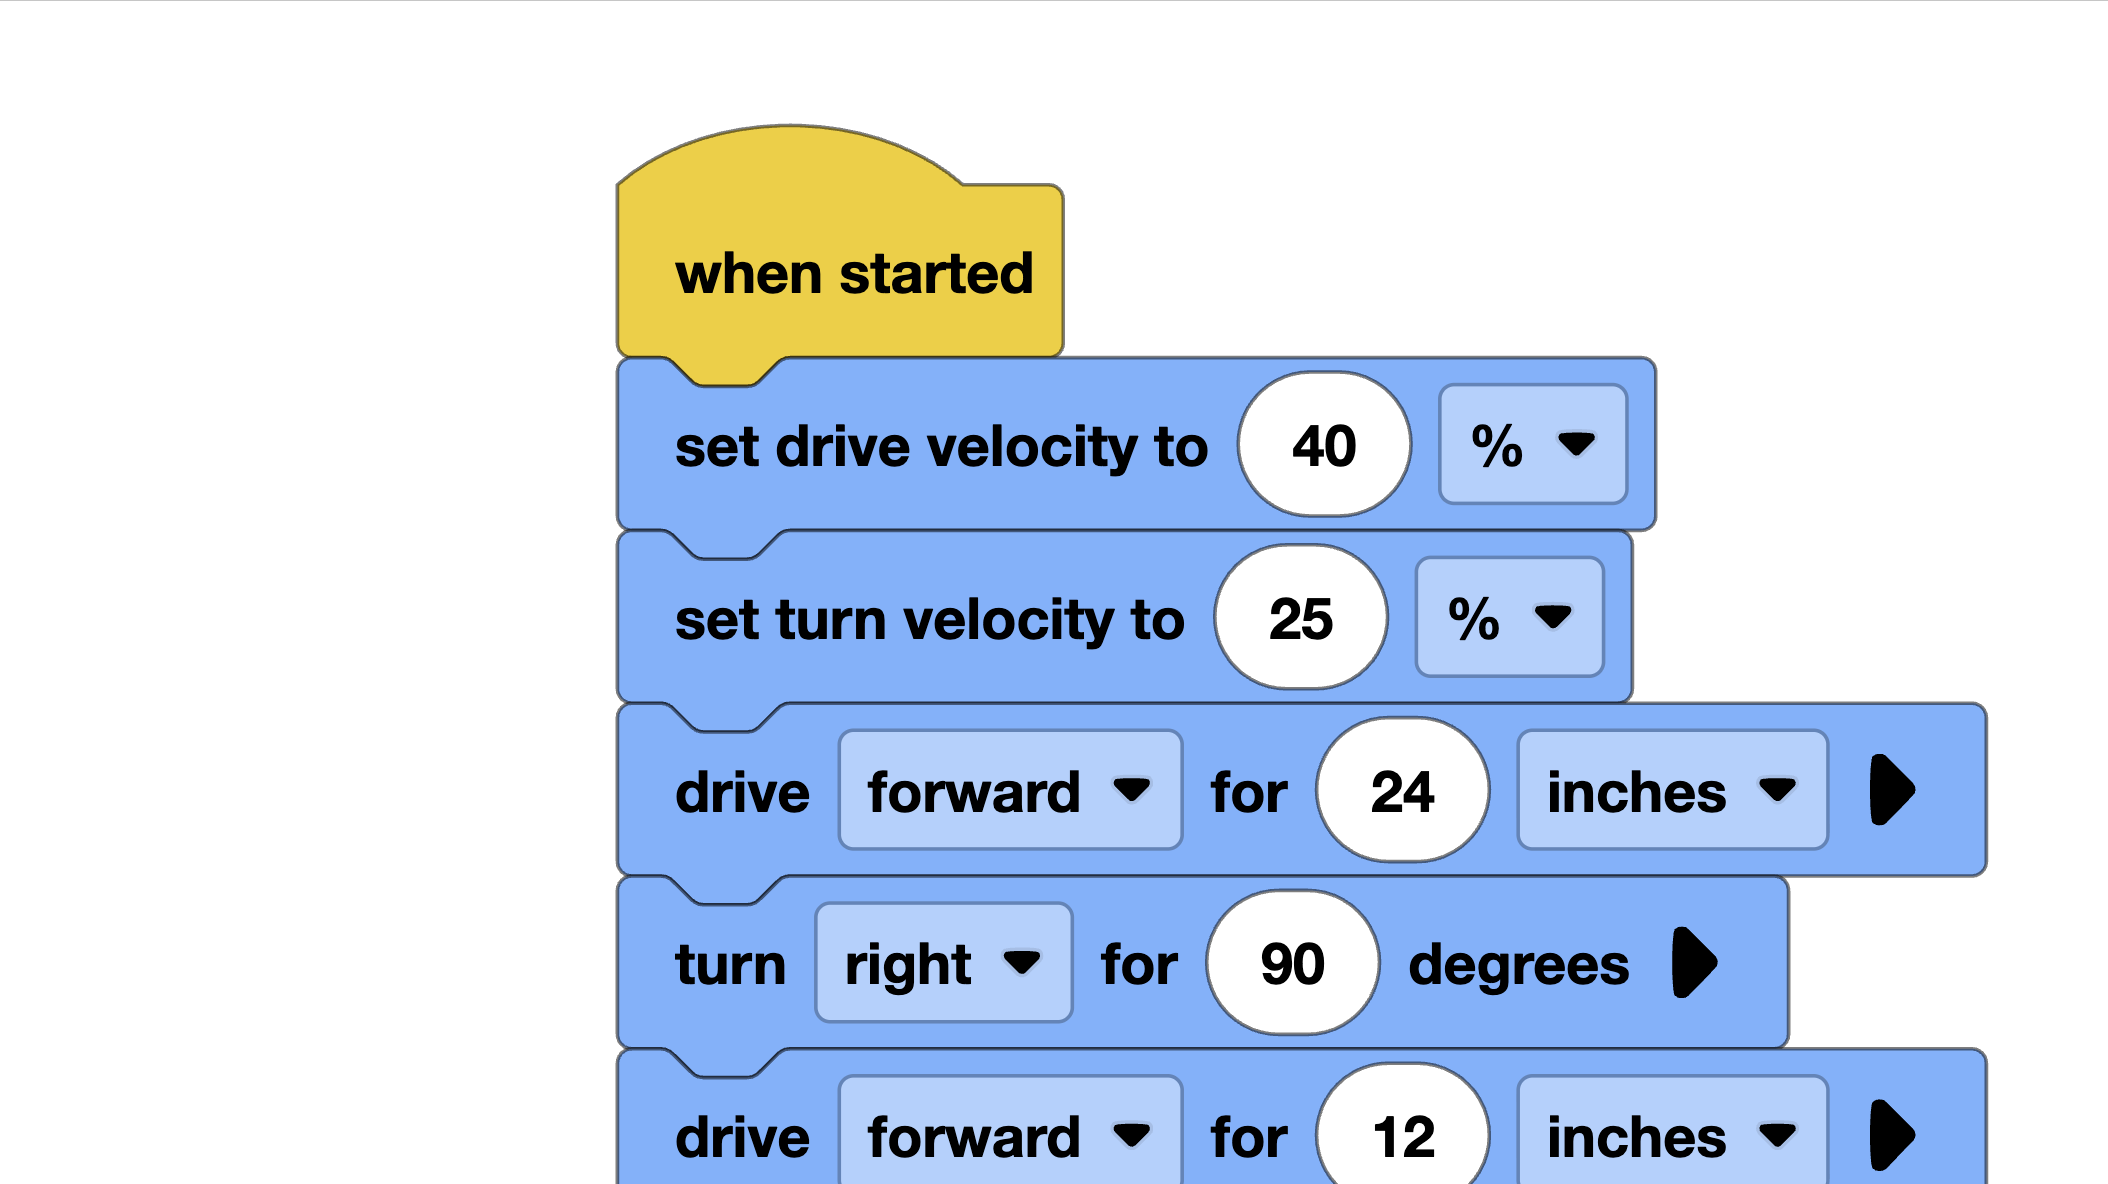
That is it! Six lines of actual movement code and your robot traces a clean L-shape. Try changing the distances and see what happens.
Example: Drive in a Square
Now let’s level up. A square is just four sides with four 90-degree turns:
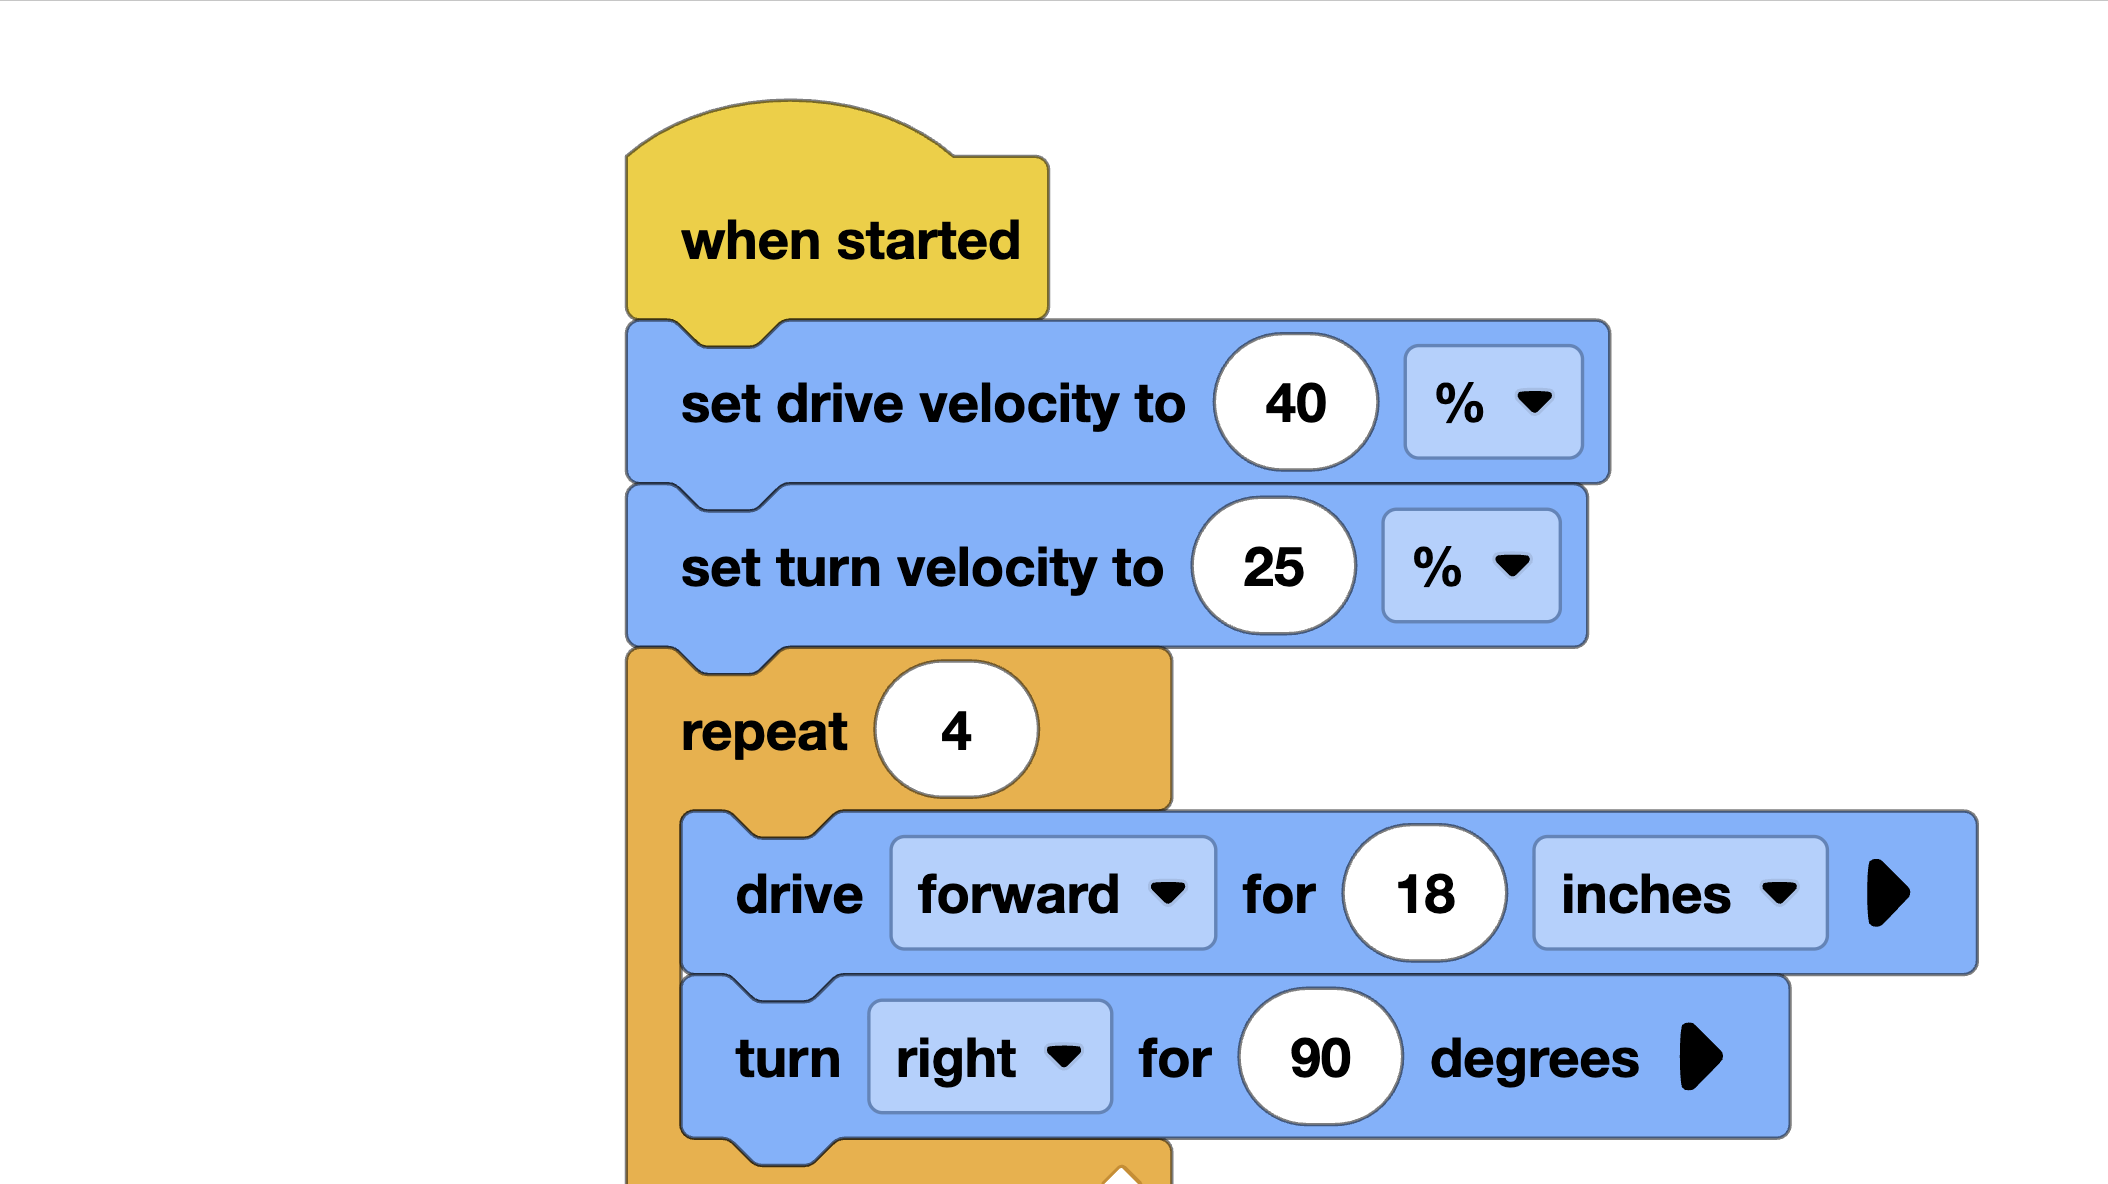
Using a for loop keeps our code clean. If you run this and the robot does not end up exactly where it started, do not worry — that is totally normal. Small errors in each turn add up. We will learn how to fix this with sensors in the next tutorial.
Common Pitfalls
Here are mistakes that trip up almost every team at some point:
Wrong Wheel Size in Config
If you enter 200mm for wheel travel but your wheels are actually 250mm, every distance will be off by 25%. Measure your wheels carefully.
Forgetting to Reverse a Motor
If your robot spins in circles instead of driving straight, one motor probably needs to be reversed. Flip the True/False on one of your motor definitions.
Going Too Fast
We already covered this, but it is worth repeating. Start slow, get your routine working, then gradually increase speed if you need to.
Not Accounting for Battery Level
A fully charged battery makes the motors spin faster than a half-dead one. Your beautiful autonomous routine at practice might behave differently at competition. Test at different battery levels and keep your batteries charged.
Competition Tip
In our early competitions, our robot kept veering left. We checked the code a dozen times — everything looked perfect. Turns out we had the wheel circumference wrong by 5mm. That is less than a quarter inch, but over a 4-foot drive, the error added up to several inches of drift. Once we measured the wheels properly and updated the config, the robot drove straight as an arrow. Small numbers, big difference.
The lesson? Always double-check your measurements. And when something goes wrong, start by checking the simple stuff first.
VEXcode Blocks Equivalent
If you are using VEXcode Blocks instead of Python, the same concepts apply. Look for the Drivetrain category in the toolbox. The “Drive for” and “Turn for” blocks work the same way as the Python commands. Make sure you configure your drivetrain in the robot configuration screen with the correct motor ports, wheel size, and track width.
Challenge: Trace Your Initials
Here is your challenge for this lesson: program your robot to trace your initials on the floor.
Some tips:
- Start with just the first letter of your name
- Sketch the letter on paper first and plan out the drives and turns
- Use a marker taped to the robot (or watch the wheels on a dusty floor) to see the path
- Letters with curves (like S or O) are harder — try blocky versions first
If you can make your robot write your initials, you have a solid grasp of drivetrain basics. Nice work.
What’s Next?
Driving set distances and turning set angles is a great start, but it is also a bit like driving with your eyes closed. In the next tutorial, Sensor Introduction, we will learn how to give your robot “senses” so it can react to the world around it — and that is when autonomous programming gets really powerful.